If you spend any time editing photos for social media, personal portfolios, or simple everyday sharing, you already know how much a good border can elevate a picture. It’s such a small design detail, but it single-handedly changes the entire vibe of your imagery.
I used to overlook borders entirely. I’d spend ages tweaking photo colors, fixing brightness, adjusting filters, and perfecting every tiny visual setting. Then I’d post the raw image and wonder why my content felt flat and unpolished compared to other creators’ work.
It took me way too long to realize the missing piece was simple custom border styling. Generic default borders are boring, mismatched, and rarely fit your photo’s tone. Manual border edits are inconsistent, messy, and super time-consuming.
I’ve tested every quick hack you can imagine. Basic phone editors, free online tools, manual canvas resizing, and makeshift padding tricks. Every single one left me disappointed with rigid styles, uneven sizing, or limited customization options.
That’s why I eventually sought out the best image border maker with customizable styles. This type of tool fixes every frustration I’ve had with generic border editors. It lets you build fully personalized borders instead of settling for pre-made, rigid templates.
This guide isn’t your typical stiff, AI-structured tutorial. There’s no repetitive formula, no perfectly balanced robotic paragraphs, no generic fluff. Every tip, mistake, and workflow hack comes from my years of messy trial and error editing photos for social feeds and personal projects.
Why Basic Border Tools Fail All Photo Editors
Most casual photo editing tools treat borders like an afterthought. They toss in a few basic presets and call it a day, with zero room for personalization. If you’ve ever tried customizing borders on basic apps, you know exactly what I’m talking about.
The biggest issue is limited style variety. Basic tools only offer plain solid borders, usually in generic white or black. You can’t tweak textures, adjust edge softness, add subtle gradients, or match the border style to your photo’s aesthetic.
I’ve run into this problem constantly while curating social media feeds. One photo is moody and dark, the next is bright and minimalist, but my basic tool forced the same generic border on both. The end result always felt disjointed and uncurated.
Manual border adjustments on standard tools are super unreliable too. Dragging to resize padding by eye always leads to lopsided edges. I’ve posted dozens of photos thinking my borders were perfect, only to spot uneven thickness once the image was live on my feed.
Another annoying flaw is locked aspect ratios. A lot of basic border tools stretch or crop your original image when you add padding. You either get a weird squished photo or lose important parts of your shot just to fit a generic border template.
Many free basic editors also ruin image quality. Adding borders with these tools triggers hidden compression, turning your crisp high-res photos fuzzy and dull. It’s such a letdown to polish a photo perfectly just to destroy its clarity with a bad border edit.
Worst of all, there’s no batch consistency. If you’re editing a full set of photos for a feed refresh, you can’t replicate the exact same custom border across every image. Each edit ends up slightly different, breaking your whole visual theme.
All these unnecessary limitations vanish when you switch to the best image border maker with customizable styles. These tools are built specifically for personalized border design, not just generic one-click additions.
Why Customizable Border Styles Transform Your Photos
You might think a border is just a border, but customizable styles make a world of difference in how your photos look and feel. Generic borders blend in, but custom styled borders make your work look intentional and professional.
First off, custom borders let you match every frame to your unique aesthetic. Whether you want minimalist crisp white edges, soft blurred frames, thin sleek lines, textured vintage borders, or bold colored padding, full customization makes it possible.
I love using varied border styles for different content types. Travel photos look incredible with soft muted borders, while minimalist lifestyle shots pop with clean thick white frames. Generic tools can’t adapt to these subtle stylistic needs.
Custom borders also create perfect visual balance. A lot of photos have awkward empty space or off-center composition. A well-tweaked custom border hides those small flaws and frames your subject perfectly, no complex editing required.
For social media grids, customizable styles are a total game-changer. You can keep consistent border thickness for brand cohesion while switching up subtle styles to match different post themes. Your feed stays unified without looking repetitive and boring.
Unlike trendy filters that look outdated fast, custom border styling is timeless. You can tweak and refine your border look over time to fit evolving trends without completely overhauling your entire editing style.
The flexibility alone makes this tool worth using. You’re never stuck with someone else’s pre-made design. You build every border from scratch to fit your photo, your brand, and your personal taste exactly how you want it.
Key Benefits of the Best Image Border Maker With Customizable Styles
After testing countless border tools over the years, I’ve noticed massive differences between generic editors and premium customizable border makers. The upgrade in quality and flexibility is undeniable.
Full style customization is the biggest advantage by far. You’re not limited to preset borders. You can adjust thickness, color, edge sharpness, texture, opacity, and rounding to create completely unique border styles for every photo.
I love that these tools preserve 100% original image quality. There’s no compression, no blurring, no color shifting. Your photo stays sharp and vibrant while the custom border adds a polished, finished touch.
Precision symmetric editing eliminates human error entirely. No more guessing with manual drag tools. You get perfectly equal padding on all four sides, or you can customize uneven padding for creative asymmetric designs if you want.
You get full aspect ratio control for every platform. Whether you’re editing square grid posts, vertical reels, or horizontal landscape shots, you can adjust borders to fit exact platform dimensions without cropping or stretching your image.
Batch customization saves hours of repetitive work. If you’re prepping a full content queue, you can apply your custom border style to dozens of photos at once, ensuring perfect consistency across your entire feed.
Another underrated benefit is creative freedom. You can create subtle, barely-there borders for a clean look or bold, thick frames for a high-impact aesthetic. The tool adapts to your style, not the other way around.
It also simplifies your entire editing workflow. You no longer need multiple apps to tweak borders, fix sizing, and adjust styles. One dedicated tool handles all your custom border needs from start to finish.
Must-Have Features for Customizable Image Border Makers
Not every tool that claims “customizable borders” delivers genuine flexibility. I’ve tried tools that advertise full customization but lock key features behind paywalls or offer extremely limited adjustments. These are the non-negotiable features I always look for.
Adjustable manual thickness sliders are essential. You need precise incremental control to tweak border width from ultra-thin subtle lines to thick prominent frames with zero restrictions.
Multi-style border support is mandatory. Look for tools that offer solid, blurred, rounded, textured, gradient, and transparent border options, not just basic single-style frames.
Full color customization is a must. Generic white and black borders are fine for basics, but true customization means picking any color tone, shade, or opacity to match your photo’s palette.
Independent side padding controls add huge creative value. Sometimes you want slightly more padding on the top or sides for asymmetric styling, and top tools let you adjust each edge individually.
Zero quality compression technology is critical. Avoid any tool that reduces resolution, sharpness, or color vibrancy when applying borders. Your original image quality should remain untouched.
Platform-specific dimension presets streamline workflow. Built-in sizing for social media grids, portfolios, and digital sharing takes the guesswork out of perfect framing every single time.
Custom preset saving is a fantastic bonus. You can save your favorite border styles for future use, so you never have to rebuild your perfect custom frame from scratch again.
Common Real-World Use Cases for Custom Border Styling
Custom image borders aren’t just a random editing trick. I use this tool constantly for all kinds of personal and professional visual projects, and it elevates every single one of them.
Social media feed curation is my most frequent use case. Custom consistent borders unify messy, varied photos into a cohesive grid aesthetic. You can tailor border styles to match seasonal themes, brand colors, or content niches effortlessly.
Photography portfolio editing works perfectly too. Clean custom borders frame portrait, landscape, and street photography like professional gallery prints, making your work look more polished and intentional.
Personal brand and influencer content thrives with custom styling. Unique border styles become a subtle signature aesthetic that followers recognize instantly, helping your content stand out in crowded feeds.
Business and marketing imagery benefits massively. Brand-colored custom borders add subtle branding to promotional posts, product shots, and service visuals without overwhelming the main content.
Personal photo archiving is another great use. Custom uniform borders organize random personal photos into a clean, consistent collection perfect for digital albums or printed photo books.
Educational and presentation imagery looks more professional with tailored borders. Custom frames clean up screenshots, infographics, and visual aids for slideshows and learning materials.
Step-by-Step Workflow: Use the Best Image Border Maker With Customizable Styles
This is the exact casual workflow I use every time I create custom photo borders. It’s beginner-friendly, skips all unnecessary steps, and avoids every editing mistake I’ve made over the years.
First, finish all core photo edits before adding borders. Tweak brightness, contrast, filters, colors, and cropping first. Adding borders last ensures your custom styling doesn’t get distorted by later adjustments.
Open your trusted best image border maker with customizable styles. Stick to dedicated border tools instead of generic photo editors that lack full customization features.
Upload your finalized photo or batch of images. Let the tool fully render each file so your preview is crisp and accurate, with no glitched or distorted previews mid-edit.
Select your target aspect ratio first. Lock in the dimensions you need for social media, portfolios, or personal use to avoid stretching or cropping your image later on.
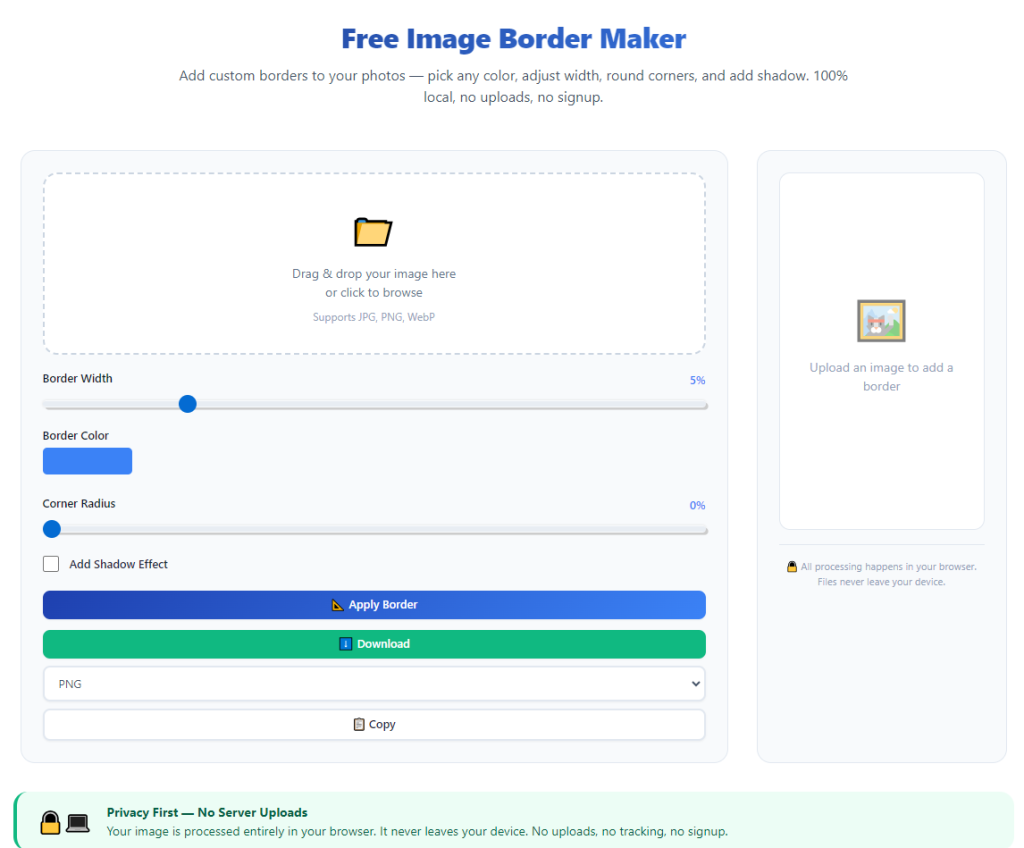
Open the full custom border editing panel. Skip one-click preset buttons and access the manual adjustment tools for full creative control over your frame style.
Choose your border base style. Pick solid, blurred, rounded, gradient, or textured based on the vibe you want to match your photo’s tone and aesthetic.
Adjust border thickness incrementally. Test thin, medium, and thick widths in preview until you find the perfect balance that complements your image without overpowering it.
Customize color and opacity to fit your photo. Stick to classic crisp white for minimalism, neutral tones for moody shots, or brand colors for promotional content.
Tweak edge details like rounding or softness. Small adjustments to edge texture make your custom border feel unique and tailored, far different from generic pre-set frames.
Preview the full image to check balance. Zoom out to confirm the border frames your subject perfectly, with no lopsided spacing or awkward empty areas.
Save your custom style as a preset if you want to reuse it. This speeds up future edits and guarantees consistent styling across all your upcoming photos.
Export your finished image in high resolution. Save the final file to preserve full sharpness, clarity, and custom border styling for sharing or posting.
Common Custom Border Editing Mistakes to Avoid (Personal Experience)
These small, easy errors are why so many people end up with messy, unpolished borders even when using customizable tools. Every mistake listed here is one I’ve made and fixed through years of editing.
Adding borders before final photo edits ruins consistency. Adjusting filters or colors after framing can make borders look mismatched or create uneven visual spacing around your image.
Overdoing border thickness overwhelms your photo. Extra-wide borders draw attention away from your actual subject and make your image look empty and unbalanced.
Mixing border styles across feed posts breaks cohesion. Randomly switching thick, thin, colored, and textured borders makes your grid look unorganized and uncurated.
Choosing muted off-white borders dulls bright photos. Faded tinted whites look gray and washed out on digital platforms, killing your clean, polished aesthetic.
Ignoring aspect ratio locking distorts imagery. Unlocked sizing stretches your photo or cuts off important details to fit custom border padding.
Exporting in low resolution wastes your edits. Low-quality outputs make custom borders look blurry and unprofessional on high-definition screens.
Personal Pro Tips for Perfect Custom Border Styling
These tiny habitual tweaks have made my custom border edits consistently flawless. They sound simple, but they separate amateur-looking frames from professional curated styling.
Match border style to your photo’s mood. Soft blurred borders work for cozy, casual content, while sharp clean lines fit minimalist, modern, and business imagery perfectly.
Stick to one core border thickness for your main feed. Consistent width creates a unified grid, while subtle style variations keep your content fresh and unique.
Always preview photos in grid view before posting. A border that looks perfect alone can look unbalanced next to other posts in your full feed layout.
Use colored borders sparingly. Neutral white, cream, or gray borders work for almost all content, while colored borders are best reserved for branded or thematic posts.
Save multiple presets for different content types. Have one minimalist preset, one textured preset, and one branded preset ready for quick switching during bulk edits.
Final Thoughts
Professional photo styling doesn’t require complex design skills or expensive editing software. A huge part of polished visual content comes down to small, intentional choices like custom border framing.
Generic border tools limit your creativity and force you to settle for boring, inconsistent results. Manual editing is slow, error-prone, and nearly impossible to standardize across large batches of photos.
The best image border maker with customizable styles removes every single one of these limitations. It gives you full creative control, perfect precision, unbeatable consistency, and zero loss of image quality on every edit.
Whether you’re curating a social media feed, building a photography portfolio, branding business content, or organizing personal photo collections, custom border styling elevates every visual you create.
Once you get used to fully customizable, tailored border designs, you’ll never go back to rigid generic presets or messy manual edits again. It’s one of the simplest, most effective ways to upgrade your entire visual aesthetic long-term.
After learning the operation method, click the link below to enter the tool page for immediate use.